Key Takeaways:
- The 90s supermodel look centers around matte skin, defined brows, neutral matte lips, and subtle contour
- Prep is crucial—proper skincare ensures matte makeup doesn’t look flat or cakey
- Modern adaptations use strategic highlighting to prevent the dated “flat” appearance
- Focus on complexion perfection, soft contour, and understated eyes with emphasis on lashes
- Product selection matters—opt for long-wearing formulas designed for a natural matte finish

I remember the first time I discovered my mother’s forgotten makeup bag tucked away in her vanity drawer—a time capsule from 1994, filled with brown lip liners, taupe eyeshadows, and that perfectly well-loved compact of pressed powder.
The scent of those products, waxy and distinctive, transported me to a world of supermodels who stalked runways with confident strides and gazed from glossy magazine pages with cool indifference.
Their faces—perfectly matte, sculpted, and understated—became the blueprint for what I’ve come to love most about makeup’s transformative power.
The 90s supermodel look wasn’t just makeup; it was attitude distilled into pigment. Think Cindy Crawford’s perfect matte skin and defined brows.
Naomi Campbell’s sculpted cheekbones and neutral lips. Kate Moss’s undone-but-perfect minimalism that somehow made “effortless” look meticulously crafted. These weren’t just beautiful women—they were icons who defined an aesthetic that continues to influence beauty standards decades later.
While today’s beauty world often celebrates dewy, glowing skin, there’s something undeniably powerful about the controlled perfection of 90s matte glamour.
It’s polished without being prissy, sexy without trying too hard, and timeless in a way that transcends trends. Let’s dive into how you can channel your inner supermodel and recreate this iconic look with modern products and techniques.
Skin Prep: The Invisible Foundation
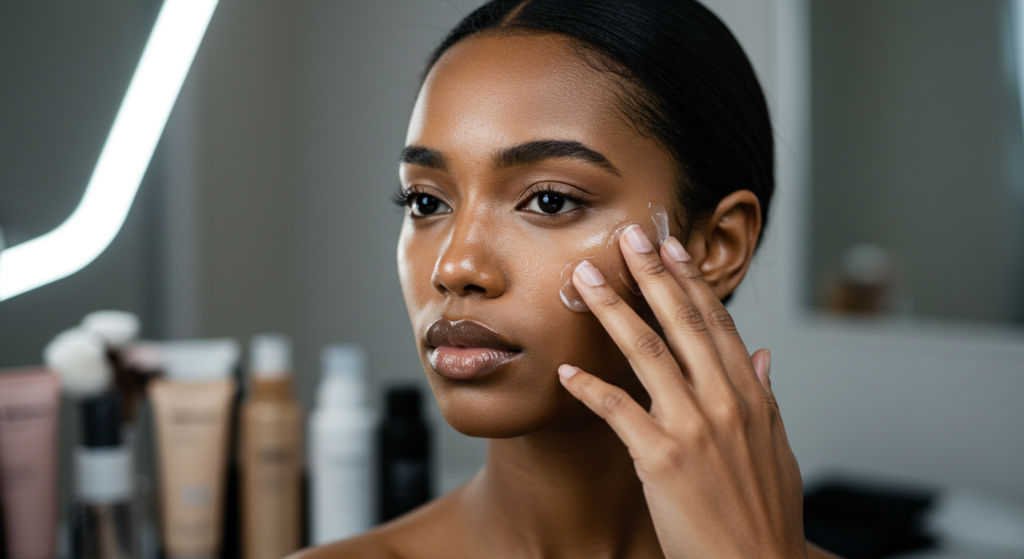
Before we talk makeup, let’s talk skin. The 90s matte look isn’t about cakey, flat foundation—it’s about controlled, perfected skin. And that starts with proper prep.
Exfoliation: Your Secret Weapon
Matte makeup shows every flake and texture issue. Use a gentle chemical exfoliant (think lactic or mandelic acid) twice weekly to keep your skin smooth. Physical scrubs work in a pinch but use a light touch—we’re aiming for smooth, not irritated.
For a quick pre-makeup exfoliation when you’re in a hurry, dampen a washcloth with warm water and gently buff away any dry patches. I’ve found this works miracles when foundation keeps catching on dry spots around my nose.
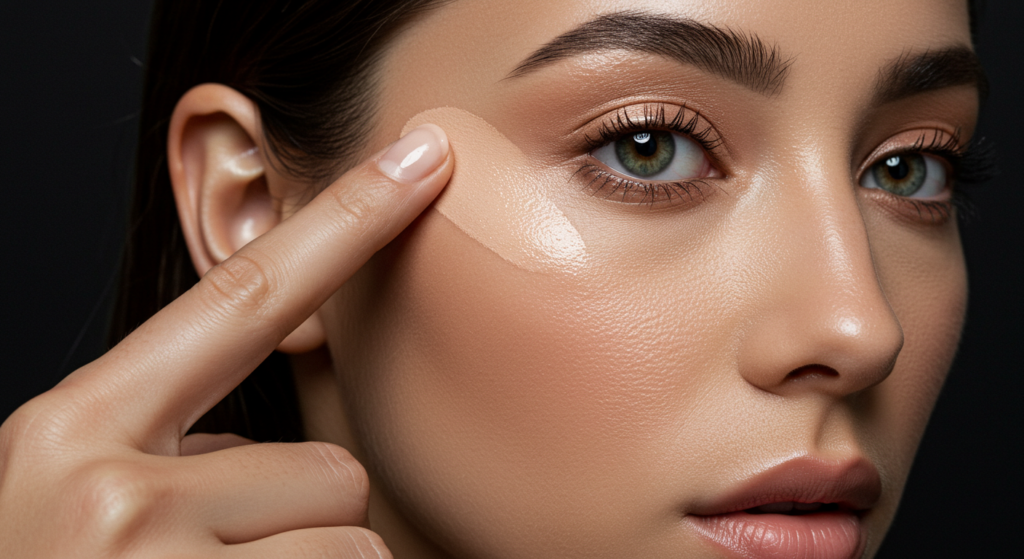
Hydration Without Shine
Here’s where people get it wrong: matte doesn’t mean dehydrated. Apply a water-based, oil-free moisturizer and let it fully absorb (about 5-10 minutes). Look for ingredients like hyaluronic acid or glycerin that hydrate without leaving residue.
A makeup artist once told me the oddest tip that changed my foundation game forever: tap your moisturizer into your skin rather than rubbing, and you’ll avoid that pilling that happens when products don’t play well together.
Primers That Actually Work
Not all primers are created equal. For the 90s supermodel look, skip illuminating or dewy primers and opt for pore-filling, mattifying formulas only where needed—typically the T-zone. Apply with fingers and press, don’t rub.
I wasted years using primers all wrong—slathering them everywhere like moisturizer. Now I use them strategically, focusing on areas where makeup typically breaks down (for me, that’s around my nose and on my chin).
Foundation: Flawless Not Flat

The 90s face was matte, but never mask-like. Modern recreations need to balance coverage with believability.
Choosing Your Formula
Forget what you think you know about matte foundation. Today’s formulas can give coverage without the dreaded cake-face of the actual 90s. Look for words like “natural matte,” “demi-matte,” or “velvet matte” on the label.
Liquid foundations work best for most skin types, but if you’re truly oily, a powder foundation applied with a damp sponge can give that perfect 90s supermodel finish. I’ve tried both approaches depending on the season—powder foundation in summer, liquid in winter when my skin needs more help.
Application Techniques
Channel your inner Linda Evangelista and perfect these application methods:
- For sheer, natural coverage: Use fingers to warm the product and press it into skin
- For medium coverage: Stipple with a damp beauty sponge, focusing on the center of the face
- For full coverage: Use a dense foundation brush using small circular motions, then blend edges with a sponge
Most makeup mistakes happen because of poor blending. Take the extra 30 seconds to blend foundation past your jawline and into your hairline—supermodels never had foundation lines.
Setting Without Caking
The key difference between modern and actual 90s matte makeup? Strategic setting. Use translucent powder with a light hand on your T-zone, under eyes, and around the nose. The rest of your face can remain powder-free for a more modern take on matte.
I keep two powder puffs in my makeup bag—one for initial application and one clean one for pressing into the skin to remove excess. This trick alone has saved me from looking too powdery countless times.
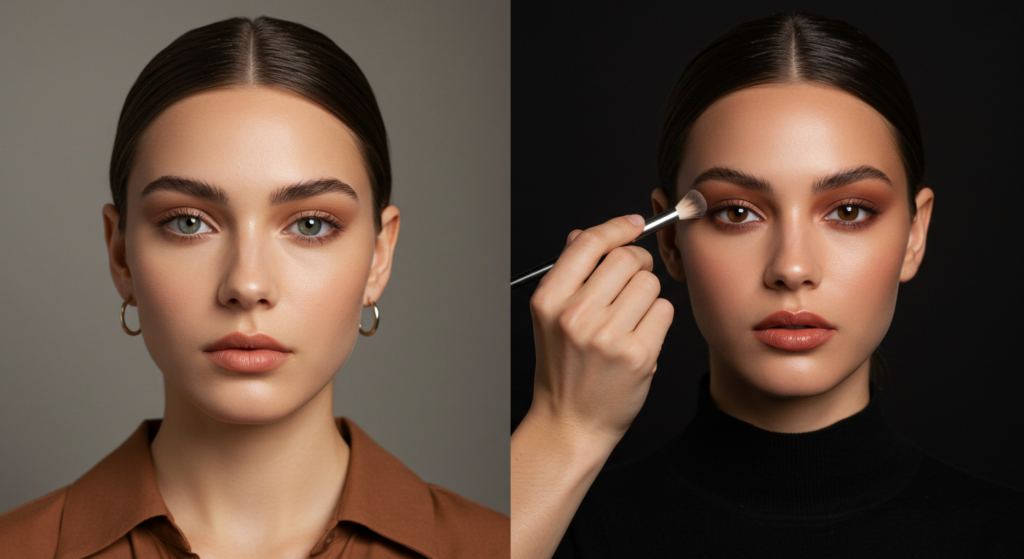
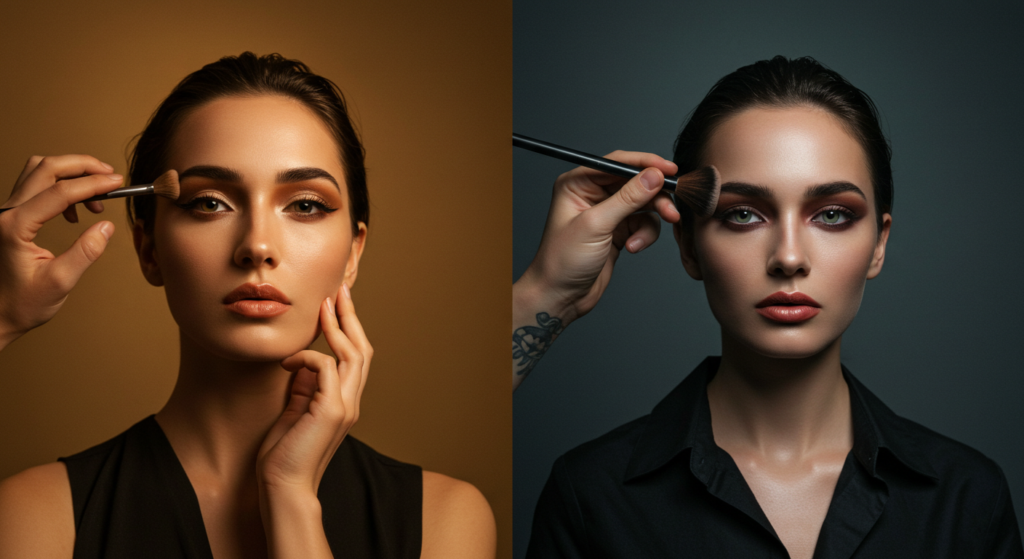
Contour & Bronzer: Sculpted Not Striped

The 90s gave us contour before Instagram made it a theatrical art form. This version is subtler and more sophisticated.
Finding Your Hollows
Forget harsh lines—90s contouring was about creating shadows, not stripes. Suck in your cheeks slightly and feel for the natural hollow with your fingers. That’s where your contour shade belongs.
Use a matte contour powder or cream that’s only 1-2 shades deeper than your skin tone with cool (not orange) undertones. Apply with a smaller, angled brush for precise placement.
Blending is Non-Negotiable
The difference between 90s supermodel contour and bad contour is blending. Use a clean, fluffy brush to soften all edges until there are no visible lines—just subtle definition.
I spent years wondering why my contour looked costumey until a makeup artist showed me I was using too much product and not blending enough. Start with less than you think you need—you can always build up.
Bronzer Placement
Apply bronzer where sun naturally hits: forehead, bridge of nose, tops of cheekbones, and chin. Use a large, fluffy brush and a light hand with a matte (not shimmer) formula.
Think of bronzer as the supporting actor to your contour’s lead role—it should warm the face without drawing attention to itself.
Blush: The Unexpected Hero
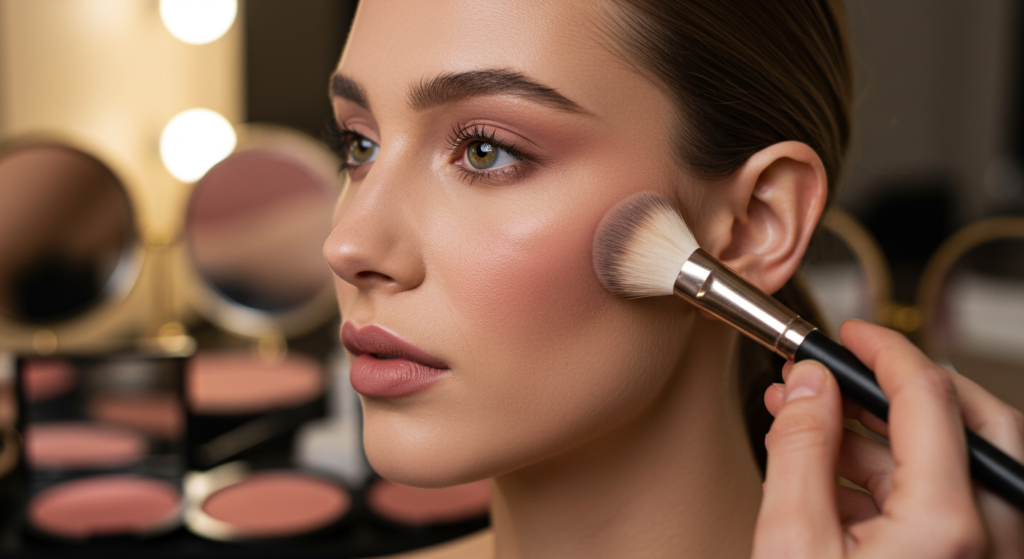
Contrary to what many think, 90s supermodel makeup wasn’t blush-free—it just used blush differently than today’s looks.
Color Selection
Forget bright pinks and corals. Choose muted, dusty roses, taupes with a hint of pink, or brownish peaches. The blush should look like a natural flush, not a statement.
A makeup artist once told me to match my blush to the color my cheeks turn after a brisk walk in cool weather. For most people, this is a muted rose-brown, not a bright pink.
Application Technique
Place blush slightly higher than you might normally, focusing on the upper apples and blending back toward the hairline. This creates lift and prevents the blush from making your face look droopy.
Use a light hand—90s blush was present but subtle. If you can immediately spot the blush in your reflection, you’ve gone too far.
Blending Seamlessly
The secret to 90s blush was its integration with contour. After applying both, take a clean brush and make small circular motions where contour meets blush to create a seamless transition. No harsh lines allowed.
I’ve found using my foundation brush (with leftover product) to tap over the edges of my blush helps everything look like it’s coming from within the skin rather than sitting on top.
Eyes: Defined Yet Effortless
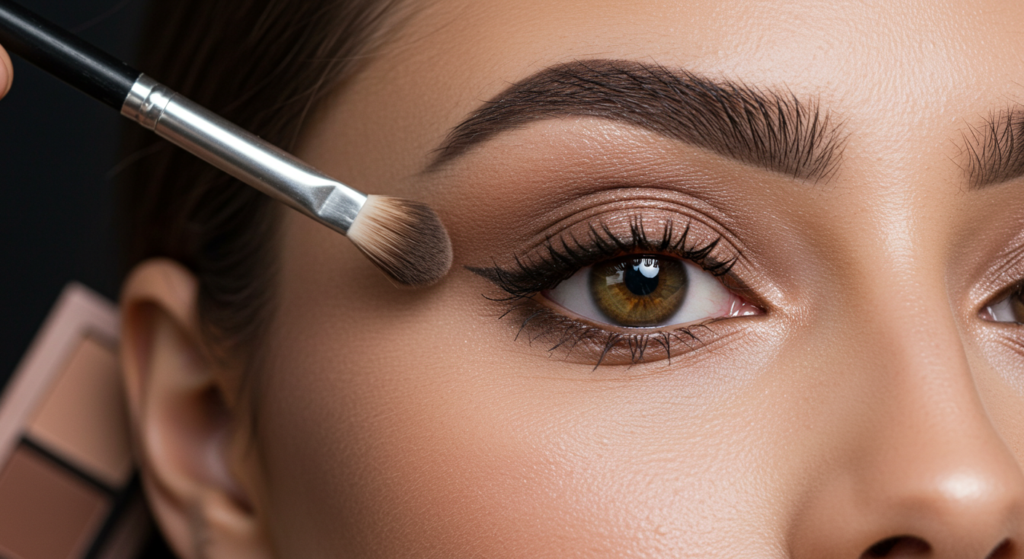
The 90s supermodel eye was sophisticated without being complicated—focused on shape and definition rather than color.
Perfecting the Socket Line
Use a matte taupe or light brown shadow and a fluffy blending brush to define your crease. Focus on creating depth rather than a visible line of color. This isn’t a cut crease—it’s about subtle dimension.
I spent years making my crease too dark until I realized 90s supermodels used shadow to create the illusion of depth, not obvious makeup.
Lid Colors That Enhance
Stick to neutral mattes—bone, taupe, soft brown, or even warm gray. The lid color should enhance your eye shape without screaming “eyeshadow!” Cream formulas give that perfect 90s-but-modern finish.
For darker skin tones, try deeper caramel tones instead of typical “nude” shades, which can look ashy. The goal is to enhance your natural coloring, not fight against it.
Liner Techniques
Skip liquid liner for this look. Instead, use a dark brown or black pencil, apply it to your upper lash line, and then smudge with a small brush or your finger. The line should look softly defined, not sharp.
Tightlining—applying liner to your upper waterline—was a supermodel secret for defined eyes without obvious liner. Use a waterproof formula to prevent smudging.
Brows: Structured Not Instagram
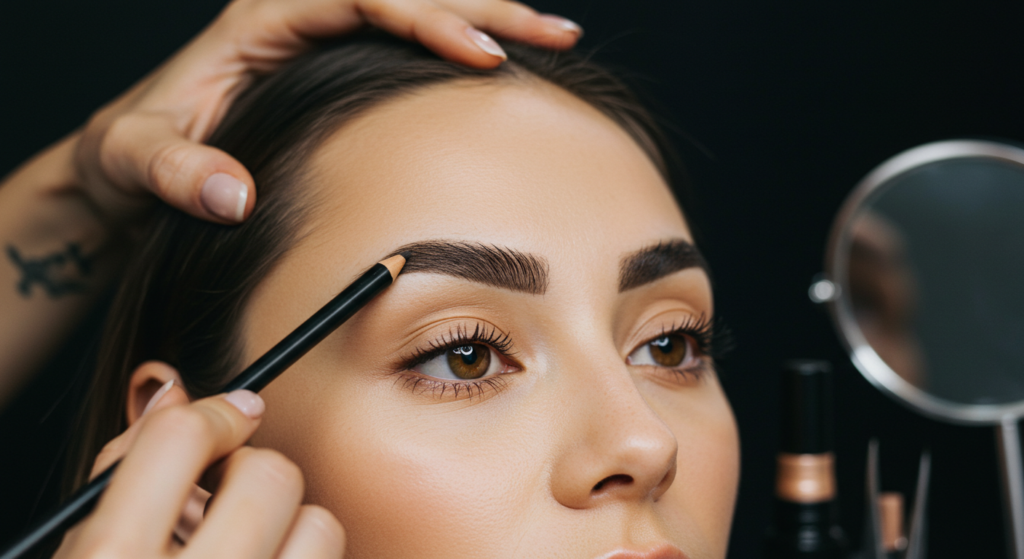
If there’s one feature that defined 90s supermodels, it was their brows—strong yet natural, defined yet never cartoonish.
Shape Matters
90s brows were full but groomed, with a defined arch. Pluck only obvious strays, focusing on creating clean edges rather than changing your natural shape.
Many make the mistake of over-plucking the arch—90s brows maintained fullness throughout with just a subtle lift toward the end.
Filling Technique
Use a brow pencil a shade lighter than your actual brow color and make short, hair-like strokes only where needed. Focus on extending the tail and filling gaps, not heavy outlining.
Set with a clear brow gel, brushing upward at the front and following your natural arch for the rest. The finished look should be defined but never harsh.
What to Avoid
Skip pomades, Instagram-style ombré effects, or overly rectangular shapes. The goal is enhanced natural brows, not a statement brow that takes over your face.
I cringe when I look back at photos where my brows were practically drawn on with a Sharpie. The 90s supermodel brow had dimension and texture—it looked like actual hair.
Lips: The Quintessential 90s Statement

No feature says “90s supermodel” quite like those perfect neutral matte lips. Here’s how to get them right.
The Perfect Nude
Your ideal 90s nude is heavily dependent on your skin tone:
- Fair skin: Try rosy browns or muted mauves
- Medium skin: Warm beiges and light cinnamon tones
- Olive skin: Caramel or coffee-colored nudes
- Deep skin: Rich terracottas, chocolates, or deep cinnamon
The key is choosing a shade slightly deeper than your natural lip color—not lighter. The 90s nude accentuated lips rather than erasing them.
Liner is Non-Negotiable
Line your lips with a pencil one shade deeper than your lipstick, focusing on creating definition rather than overlining. For true 90s authenticity, try a brown or mauve tone depending on your skin tone.
I finally understood the 90s lip when a makeup artist showed me how to use liner to create structure first, then fill in with lipstick. The result is much more finished than lipstick alone.
Application for Longevity
Apply lipstick with a brush for precision, blot with a tissue, dust with translucent powder, and apply a second coat. This old-school technique creates true matte longevity without modern liquid lipstick dryness.
For a modern take that’s more comfortable, try a matte lip cream instead of traditional lipstick. You’ll get the look without the drying formula issues of the actual 90s.
Lashes: The Unsung Hero
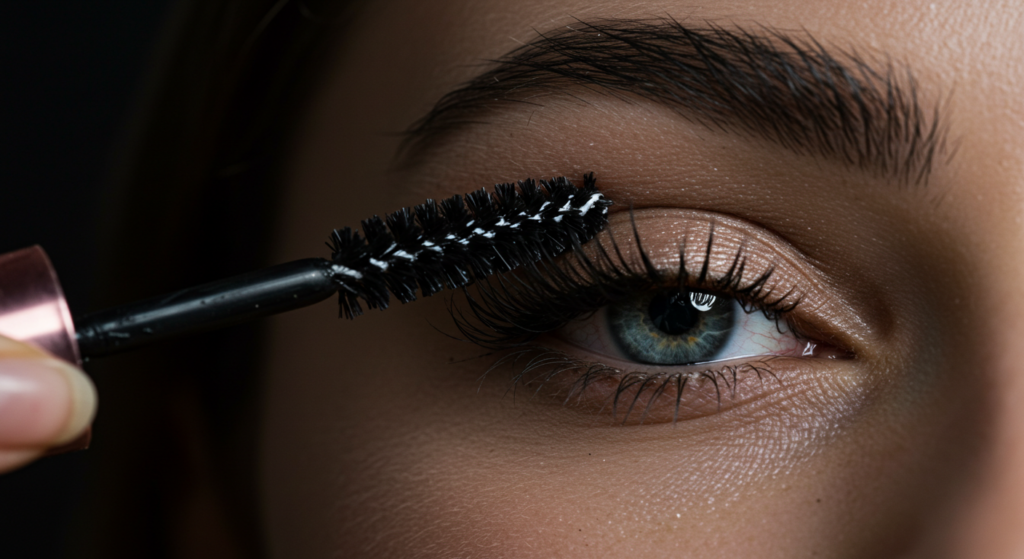
While the 90s weren’t about dramatic lashes like today, perfectly curled, defined lashes were essential to the supermodel look.
Curling Techniques
Use a lash curler before mascara, holding for 10 seconds at the base, 5 seconds at the middle, and a quick press at the tips. This creates a natural curl rather than a crimped effect.
Heat your curler for 5 seconds with a hair dryer for a longer-lasting curl. Just test the temperature on your hand first to avoid burning your eyelid (a mistake I’ve painfully made).
Mascara Application
Apply mascara at the roots first, then wiggle the wand upward. Focus on separation and length rather than volume—90s lashes were defined, not clumpy.
For truly authentic 90s supermodel lashes, apply mascara to bottom lashes as well, but use a lighter hand. Many makeup artists used to wipe most of the product off the wand before applying to lower lashes.
Individual Falsies Option
For special occasions, try individual lashes rather than strips. Place a few at the outer corner for that subtle supermodel enhancement that still looks believable.
I was intimidated by individual lashes until I realized they’re actually more forgiving than strips—if you mess up one, you haven’t ruined your entire eye look.
Highlight: The Modern Twist
True 90s makeup didn’t use highlighter as we know it today, but a strategic glow prevents the look from appearing flat by modern standards.
Placement is Everything
Apply a subtle, non-glittery cream highlight only to the high points of your cheekbones and perhaps a touch on the browbone. Avoid the typical highlighting spots like nose tip or cupid’s bow for authentic 90s vibes.
When I’m doing a 90s-inspired look, I apply highlight with my fingertip rather than a brush for a more seamless finish that doesn’t scream “I’m wearing highlighter!”
Formula Choices
Skip powder highlights altogether. If you use a cream or liquid, choose one that gives a satin finish rather than obvious shimmer or glitter. The goal is dimension, not disco ball.
Glossier Haloscope or RMS Living Luminizer are perfect examples of highlights that give that “lit from within” glow without looking like modern strobing.
Balancing Act
The more matte your overall look, the more strategic your highlight should be. A tiny amount on cheekbones can prevent the look from appearing flat while still honoring the matte aesthetic.
I’ve found mixing a drop of liquid illuminator into my moisturizer (not foundation) creates the most natural effect for a 90s-with-a-modern-twist look.
Setting the Look: Marathon Makeup

Supermodels needed makeup that lasted through long shoots and runway shows. Here’s how to make your look go the distance.
Setting Spray Savvy
While not available in the actual 90s, a matte setting spray is the modern secret to long-wearing matte makeup. Hold the bottle 8-10 inches from your face and apply in an X and T formation.
I keep my setting spray in the refrigerator during summer—the cool mist feels amazing and actually helps the makeup set better by constricting pores slightly.
Touch-Up Kit Essentials
Pack blotting papers rather than adding more powder for mid-day touch-ups. If you need to reapply powder, use a clean puff and press into skin rather than sweeping, which can disturb your foundation.
A makeup artist taught me to use a barely damp beauty sponge to press into areas that look cakey before applying any additional product—this revives the makeup without starting over.
Photography Tips
The 90s matte look photographs beautifully. If you’re taking photos, add slightly more contour and blush than you think you need, as cameras tend to flatten features and wash out color.
Avoid SPF foundation for evening events with flash photography, as it can create flashback—that ghostly white cast in photos that wasn’t an issue in the 90s when SPF wasn’t common in makeup.
Day-to-Night Transformation
The versatility of the 90s supermodel look makes it perfect for transitioning from day to evening with minimal effort.
Quick Eye Intensifiers
To take your look from day to night, smudge a deeper brown or black shadow close to your lash line and add more definition to your crease. Keep the same color family—just intensify.
I keep a small palette of matte neutrals in my bag for this exact purpose—quick dimension without having to start from scratch or add new colors.
Lip Adjustments
Switch your nude lipstick for a deeper shade in the same family—think terracotta instead of peach, or deep rose instead of pink-nude. The 90s evening lip was deeper, not brighter.
Don’t be afraid of brown. Every supermodel from the 90s rocked brown lipstick at some point—it’s sophisticated and sexy in a understated way that brights can’t match.
Subtle Addition of Dimension
Add a touch more contour under your cheekbones and jawline for evening definition. The key is intensity in strategic places, not adding more colors or products.
I rarely redo my entire face for evening. Instead, I build on what’s already there, adding definition only where it matters most—cheekbones, eyes, and lips.
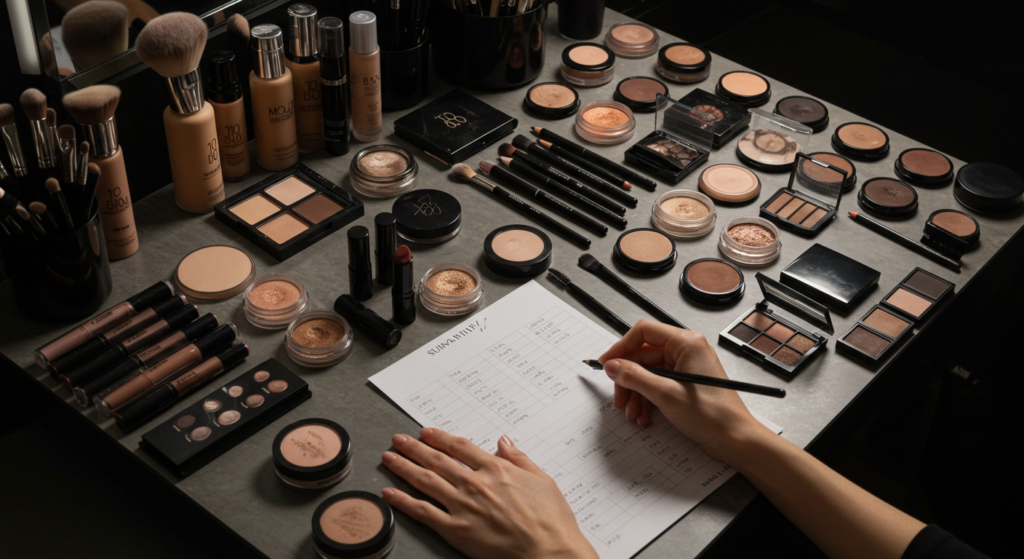
Products Worth Investing In
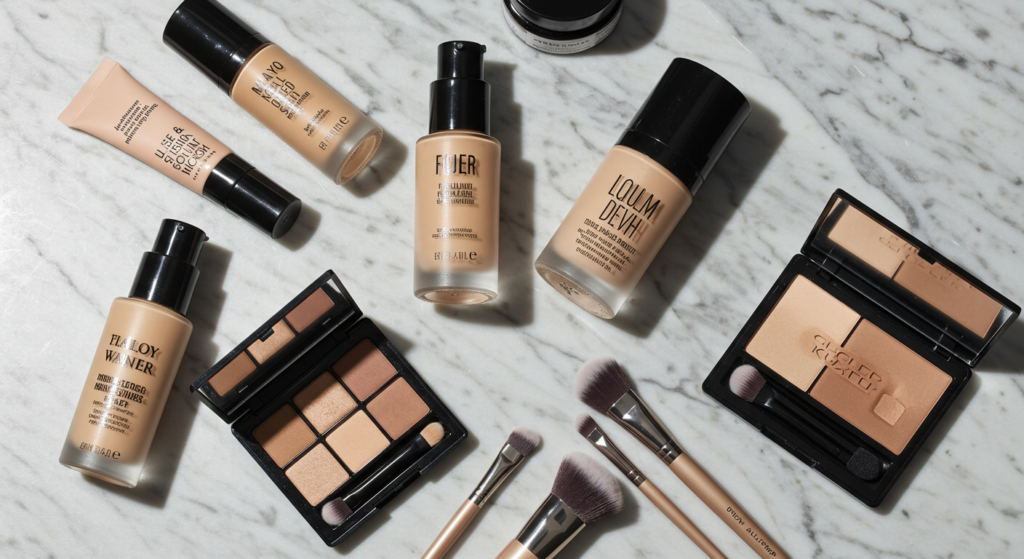
Not all products are created equal when it comes to achieving the perfect 90s supermodel matte look.
Foundation Game-Changers
While there are budget options that work, your foundation is worth investing in. Look for these standouts:
- Estée Lauder Double Wear: The gold standard for matte longevity
- Dior Forever Matte: Modern formula with a truly 90s finish
- MAC Studio Fix Fluid: A makeup artist staple since the actual 90s
I spent years trying to save money on foundation only to have it break down by lunchtime. Investing in quality base products has saved me money in the long run since I use less and it lasts all day.
Splurge-Worthy Contour Products
Your contour creates the signature 90s sculpted look, so choose wisely:
- Kevin Aucoin Sculpting Powder: The closest match to actual 90s contour shades
- Fenty Beauty Match Stix in Amber: Works on surprisingly many skin tones
- Charlotte Tilbury Hollywood Contour Wand: Foolproof application for beginners
The right contour shade should look like a shadow, not makeup. I wasted so much money on bronzers masquerading as contour products before finding the right cool-toned option.
Budget-Friendly Heroes
Save on these items without compromising your look:
- NYX Slim Lip Pencils: Perfect 90s shades at drugstore prices
- Maybelline Fit Me Matte Powder: Excellent for touch-ups
- Real Techniques brushes: Quality tools without the premium markup
I’ve found many makeup artists keep these budget gems in their professional kits alongside luxury products—proof that price doesn’t always equal quality.
Adaptation for Different Age Groups
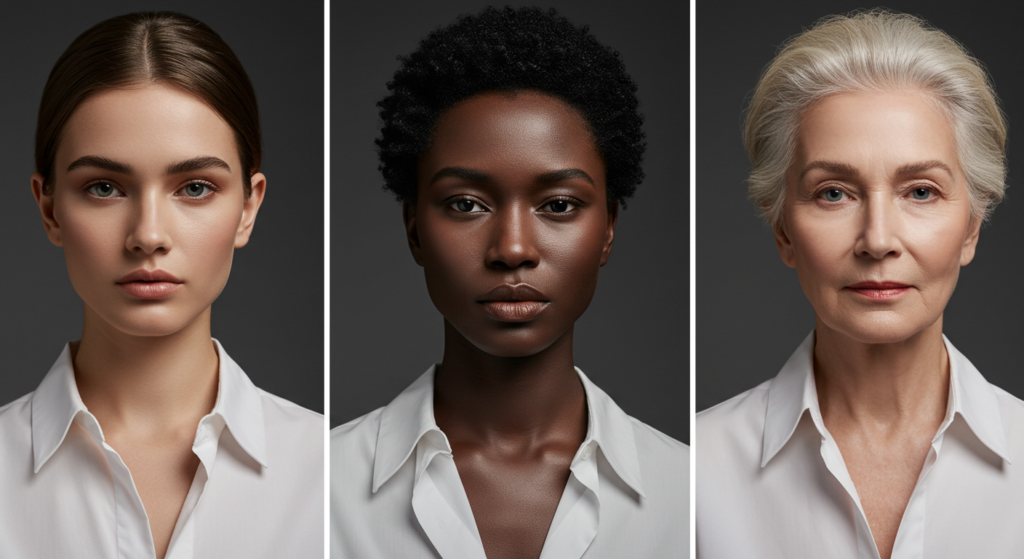
The 90s supermodel look can be adapted for any age with a few thoughtful modifications.
Teens and 20s
Focus on skin perfection and subtle definition. Skip heavy contour and opt for cream products that look more natural. Remember, most 90s supermodels were very young—their looks were age-appropriate.
I wish someone had told my teenage self that less is more. Young skin needs minimal coverage—spot conceal rather than full-face foundation for the most natural result.
30s and 40s
Emphasize hydration before matte products. Use cream formulas for blush and contour before setting with powder, which creates dimension without settling into fine lines.
I’ve found applying a hydrating mist before starting my makeup makes a world of difference in how matte products sit on my skin now that I’m in my thirties.
50s and Beyond
Embrace strategic mattifying rather than all-over matte. Keep the center of the face more luminous and use matte products only where needed. Focus on defined brows and lips to create the 90s vibe without fighting mature skin’s natural texture.
Many women make the mistake of thinking matte makeup is aging, but it’s actually about placement. My mother looks years younger when she uses matte products on her T-zone only, leaving her cheeks with a natural finish.
Climate Considerations
The 90s matte look needs tweaking based on your environment for best results.
Humid Climates
In humidity, preparation is everything. Use oil-controlling primers, waterproof formulas, and set with powder while your foundation is still slightly wet.
Living in Florida taught me to apply my makeup in layers, setting each one before moving to the next. This prevents everything from sliding off my face by noon.
Dry Environments
In arid climates, hydration is crucial before attempting matte makeup. Use a richer moisturizer and consider a hydrating primer beneath your matte foundation.
I keep a facial mist in my bag for desert trips. A quick spray before powder touch-ups prevents the dreaded cakey look that happens when adding powder to already dry skin.
Seasonal Adjustments
Lighten up everything in summer—thinner foundation layers, less contour, sheerer lipstick. In winter, you can go slightly more intense with all elements for a more dramatic interpretation of the 90s look.
My summer version of this look uses cream products exclusively, while my winter look incorporates more powders and deeper colors. Same aesthetic, different execution.
Conclusion
The 90s supermodel aesthetic endures because it strikes that perfect balance between effortless and polished, between makeup as enhancement rather than mask.
In a beauty world often dominated by extremes—either completely bare-faced or fully “beat”—there’s something refreshingly sophisticated about the controlled perfection of 90s matte glamour.
What makes this look truly timeless is its adaptability. The core principles—perfected skin, subtle contour, defined features without obvious color—can be interpreted through modern products while maintaining that unmistakable supermodel essence.
Whether you’re recreating this look for nostalgia, professional polish, or simply because you appreciate its understated glamour, remember that the 90s supermodel face was never about perfection—it was about presence.
The women who defined the era had confidence that transcended makeup, using these techniques not as a mask but as a tool to emphasize their unique beauty.
Channel that same confidence as you perfect your own interpretation of this iconic look. After all, as Linda Evangelista famously didn’t say, “We don’t wake up for less than $10,000 a day”… but with this makeup, you might just feel like you could.
Summary Table: 90s Supermodel Look Essentials
| Feature | Key Products | Application Technique | Modern Adaptation |
|---|---|---|---|
| Skin | Matte foundation, translucent powder | Apply with sponge, set strategically | Powder only T-zone, keep perimeter natural |
| Contour | Cool-toned matte powder/cream | Blend thoroughly, focus on hollows | Softer application, cream-to-powder formula |
| Eyes | Matte taupe/brown shadows | Define crease, smudged liner | Add subtle shimmer to inner corners |
| Brows | Brow pencil lighter than hair | Hair-like strokes, clear gel | Fuller through front, defined tail |
| Lips | Nude lipstick, brown/mauve liner | Line first, fill, blot, powder, reapply | Moisturize first, consider matte lip cream |
| Highlight | Subtle cream formula | High points of cheekbones only | Satin finish vs. modern metallic highlight |
FAQ: 90s Supermodel Matte Look
Is matte foundation suitable for dry skin?
Yes, with proper preparation. Exfoliate gently, use a hydrating primer, and apply a rich moisturizer at least 20 minutes before foundation. Choose a “natural matte” or “demi-matte” formula rather than a true flat matte, and set only where necessary.
How do I prevent my matte makeup from looking cakey?
Use thin layers of product, applying foundation with a damp sponge. Set only your T-zone and under-eyes with powder, and use a setting spray to meld everything together. For touch-ups, blot first before adding any additional powder.
What’s the difference between bronzer and contour in the 90s look?
Contour creates shadows and definition using cool-toned products placed in the hollows of the face. Bronzer adds warmth using slightly warmer products placed where sun naturally hits. The 90s look uses both strategically—contour for structure, bronzer for dimension.
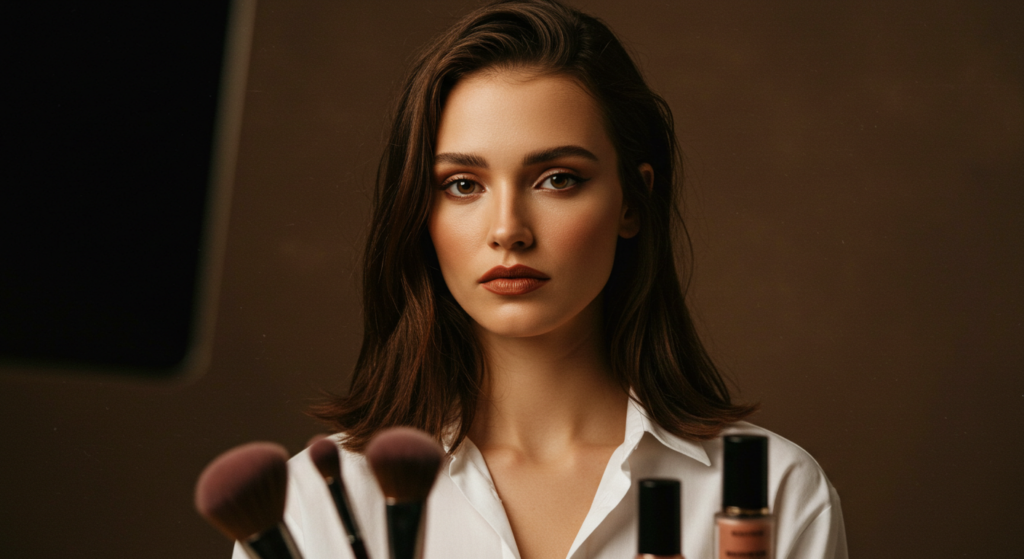
Do I need special brushes for this look?
While you don’t need an extensive collection, a few key tools help: a damp beauty sponge for foundation, a small angled brush for contour, a fluffy brush for blending eyeshadow, and a lip brush for precise application. Quality matters more than quantity.
How do I make my matte makeup last all day?
Layer your products strategically—primer, foundation, setting powder, then setting spray. For oilier skin types, use blotting papers throughout the day rather than adding more powder, which can look cakey. Touch up only where needed, typically the T-zone.
Can I adapt this look for my darker skin tone?
Absolutely! The principles remain the same, but adjust your product choices. Opt for richer nude lipsticks (think caramel, terracotta, or deep mauve rather than beige), and choose contour shades with the right undertone for your skin. Avoid ashy products that can make deeper skin look gray.
Is this look appropriate for office settings?
The 90s supermodel look is one of the most versatile and professionally appropriate makeup styles. Its emphasis on sophistication over obvious color makes it perfect for office environments.
For the most professional version, keep contour subtle and opt for more neutral lip colors.

Joanna Perez, with a degree in Creative Writing, excels in recommending distinctive clothing color mixes and trends that deeply connect with readers. She simplifies the often daunting task of color selection, making fashion decisions more personalized and impactful. Her passion for vibrant color palettes and the stories they tell makes her an indispensable voice in the fashion community.
Reviewed By: Marcella Raskin and Anna West
Edited By: Lenny Terra
Fact Checked By: Sam Goldman
Photos Taken or Curated By: Matthew Mansour